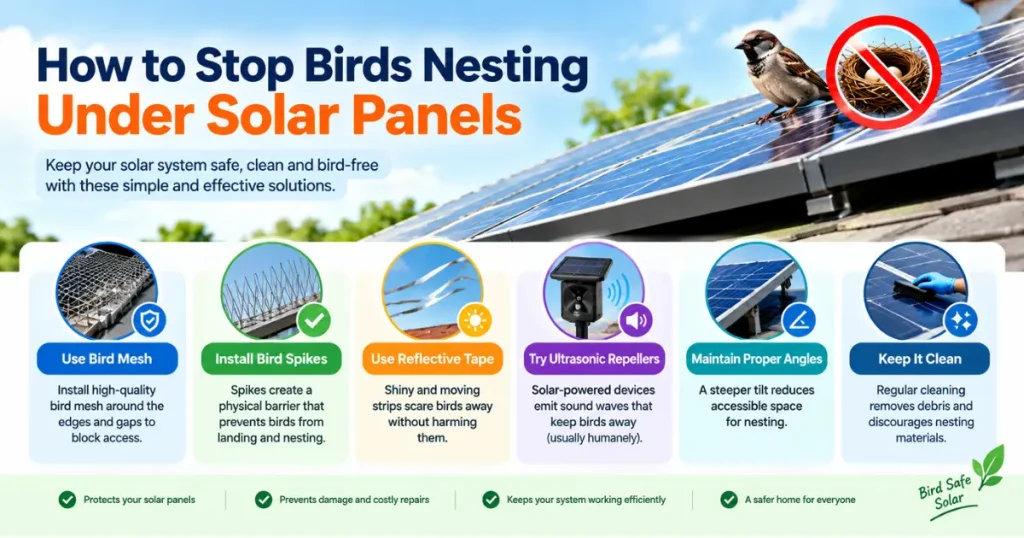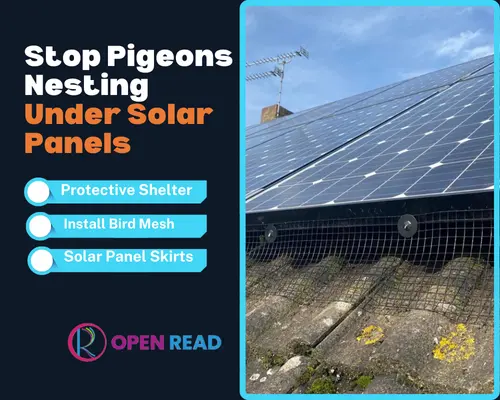
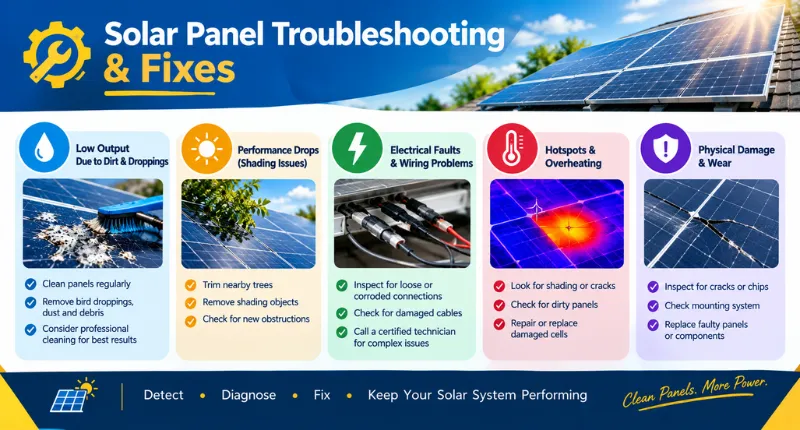
Your solar system should quietly cut your electricity bills for 25+ years. When production drops, the monitoring app goes blank, or the system stops producing entirely, the frustration hits fast, and so does the money loss. Dirt and bird droppings can quietly shave 5–15% (sometimes more in dusty climates). New shading from tree growth or a neighbor’s addition often accounts for the biggest performance hits. Inverter faults, loose or corroded connections, and occasional physical damage round out the usual suspects.
Most of these problems are diagnosable in minutes if you know what to look for. Many are simple DIY fixes; a few require a pro and should not be touched without the right training and tools. Use the flowchart below to jump straight to your issue and get answers without wading through every possible fault.
Key Takeaways:
- After installing a solar panel, regular cleaning is required to obtain a better output.
- Dirt, shading, and tripped breakers cause most solar issues, and are DIY-fixable.
- Zero production on sunny days? Check breakers and inverters first, then call a pro.
- Never open the inverter or touch DC wiring yourself.
- Small problems ignored for months can cost hundreds of dollars a year in lost production.
What’s Actually Wrong with Solar Panels? (Quick Diagnostic Flowchart)
Most solar panel troubleshooting starts with one clear symptom. Follow the path that matches what you’re seeing right now:
- System completely dead (zero production, blank inverter, no lights) → Go to “Panel Not Producing Any Power” and “Inverter Troubleshooting”
- Producing less than expected (lower kWh, higher utility bill) → Go to “Reduced Power Output”
- Monitoring app shows no data or offline → Go to “Monitoring App & Data Problems”
- Visible physical damage (cracks, burn marks, discoloration) → Go to “Physical Damage”
- Corrosion, green/white residue, or loose wires at connectors → Go to “Corrosion & Loose Connections”
Start with the matching section. Skip everything else until you rule that out.
Common Solar Panel Problems & Fixes
Most solar panel troubleshooting cases fall into a handful of predictable issues. Here’s what usually goes wrong and how to fix it.
Reduced Power Output (dirt, shading, aging)
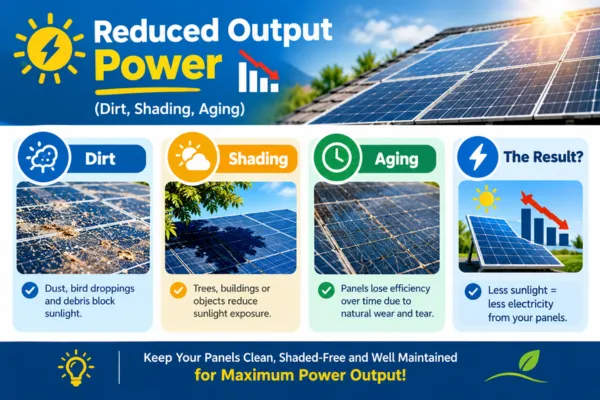
The system is running but underperforming. Common culprits:
- Dirt and soiling: Dust, pollen, bird droppings. Typical loss 5–15% (higher in dry or dusty climates). Clean with soft brush or mild soap and water on a cool morning. Avoid abrasive tools or high-pressure washers.
- Shading: New tree growth, neighbor structures, or debris. Even partial shade on one panel can drag down a whole string. Check midday shadows. Trim branches or clear debris if safe and allowed.
- Normal aging: Panels lose roughly 0.5% per year. A 10-year-old system producing 5% less than year one is usually normal, not broken.
Panel Not Producing Any Power
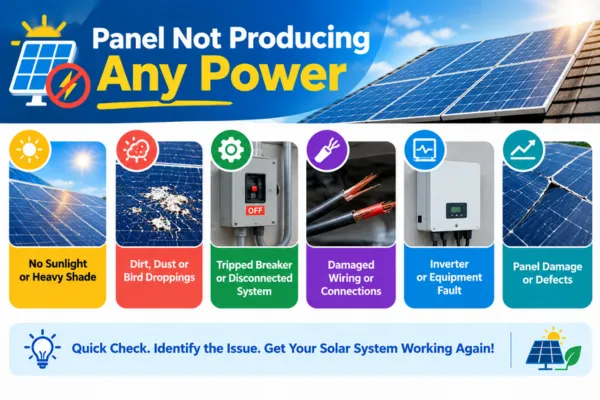
Zero output on a sunny day. Work in this order:
- Check the AC breaker labeled “Solar” or “PV” in your main panel. If tripped, reset it fully off then on.
- Look at the inverter. Blank screen or red/error light usually means the inverter is offline or in protection mode.
- Confirm DC and AC disconnect switches are both ON.
- If the inverter shows voltage on the DC side but no AC output, the problem is almost always the inverter itself.
Do not open the inverter or touch DC wiring unless you are qualified. Persistent zero production after these checks needs a technician.
Physical Damage (cracks, hot spots)
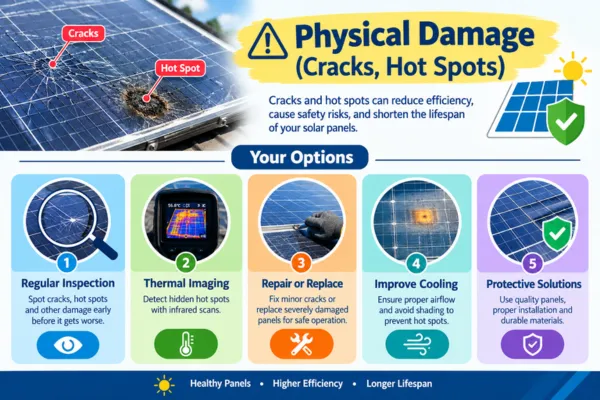
Visible cracks, shattered glass, burn marks, or localized browning/yellowing.
- Cracks and impact damage reduce output and can let moisture in.
- Hot spots appear as darkened or scorched areas; they are caused by cell defects, partial shading, or poor connections and can worsen over time or create fire risk.
Photograph the damage and note the panel serial number. Most panel warranties cover manufacturing defects and certain weather damage, but not physical impact from falling branches or hail in some policies. Replacement is almost always a professional job and does not attempt to patch a cracked panel.
Corrosion & Loose Connections
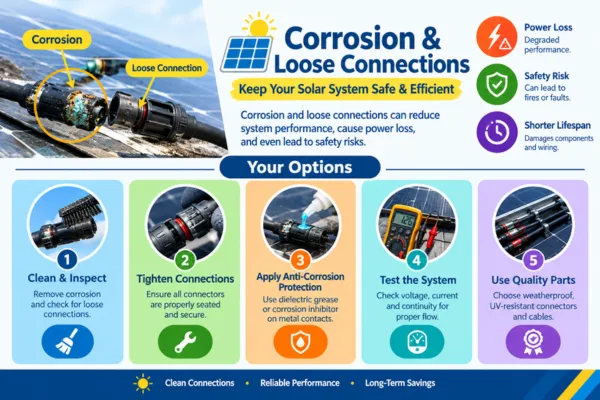
White or green powdery residue on MC4 connectors, junction boxes, or terminal blocks, or connectors that feel loose when gently tugged (power off first). Corrosion increases resistance, drops voltage, and can cause intermittent or permanent power loss. Loose connections create heat and arcing risk.
Safe steps: Visually inspect accessible connectors from the ground or a stable ladder. Look for discoloration, melted plastic, or bird nesting. Do not disconnect live DC connectors. If corrosion or looseness is clear, call a qualified solar technician proper torque and weatherproof resealing are required.
Inverter Troubleshooting
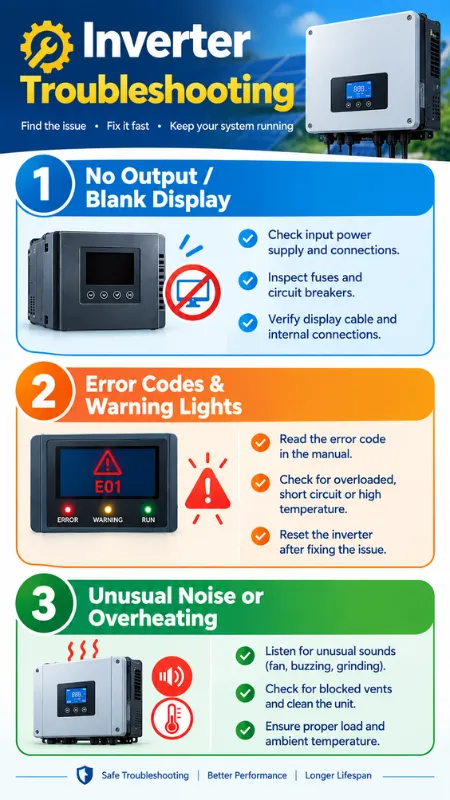
The inverter is the most common failure point in residential solar systems. When solar panel troubleshooting points to the inverter, start with the symptoms below. Most issues show up as a blank screen, an error code, or heat and noise problems.
1. No Output / Blank Display
A completely dark inverter usually means it is not receiving power or has shut down for protection.
First confirm the AC breaker labeled “Solar” or “PV” in your main panel is on. Next check both the AC and DC disconnect switches near the inverter both must be in the ON position. Look at the monitoring app: if production is also zero and the home still has utility power, the inverter itself is offline.
If the breakers and switches look correct, try a controlled power cycle: turn the DC isolator off, then the AC isolator off, wait two to three minutes, then restore AC first and DC second. Many temporary grid or communication glitches clear this way.
If the display stays blank after these steps and you can confirm voltage is present at the inverter, the unit likely needs professional diagnosis. Do not open the cover.
2. Error Codes & Warning Lights
Most modern inverters display a code or colored LED when they stop producing. Exact numbers differ by brand, but the underlying problems fall into a few clear categories. Record the exact code or LED pattern before resetting anything.
| Brand | Common Indicator | Typical Meaning | First Action |
| Enphase | Red LED / “Grid Frequency Out of Range” / “DC Resistance Low” / microinverter not reporting | Grid voltage or frequency outside limits, insulation issue, or individual microinverter offline | Check home internet and Enlighten app; note which panels are affected |
| SolarEdge | Isolation fault (e.g. 18xB0), grid voltage codes, arc fault, temperature codes | Ground/insulation fault, high or low grid voltage, arc detection, overheating | Note the exact code in the mySolarEdge app; do not repeatedly reset isolation or arc faults |
| Growatt | Codes in 200s (voltage), 300s (insulation), 400s (temperature/comms) | Grid over/under voltage, low insulation resistance, overtemperature, communication loss | Check AC voltage and ventilation; insulation faults require a technician |
Grid-related codes often clear automatically once voltage or frequency returns to normal. Isolation, ground-fault, and arc-fault codes are safety-related — stop resetting and contact your installer. For the full code list specific to your model, use the manufacturer’s app or support portal (Enphase Enlighten, SolarEdge mySolarEdge / SetApp, Growatt ShinePhone).
3. Unusual Noise or Overheating
A light hum or the sound of cooling fans running on hot afternoons is normal. Louder or new noises are not.
Grinding, rattling, or a high-pitched whine usually points to a failing cooling fan or debris in the fan path. A sudden increase in continuous buzzing can indicate overload, loose internal connections, or the inverter working harder because of high ambient temperature.
Overheating causes the inverter to derate (reduce output) or shut down entirely. Common triggers are blocked vents, items stored against the unit, direct sun exposure, or a failed fan. Clear at least the manufacturer’s recommended clearance on all sides, remove any debris from vents, and make sure the location is not a heat trap (unventilated loft or closed cupboard).
If the inverter repeatedly overheats or the fan noise becomes mechanical, schedule service. Continued operation under high temperature shortens the inverter’s life and can trigger further faults.
Battery Storage Issues
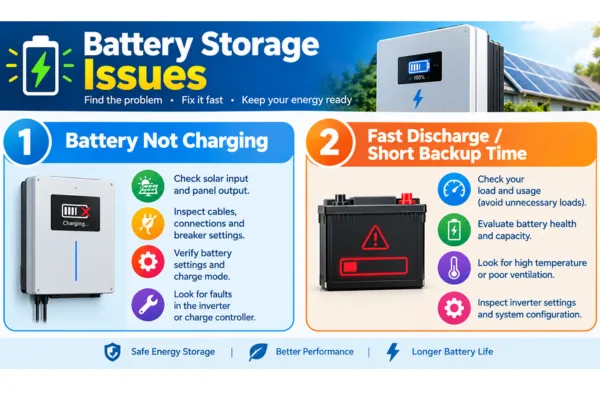
When solar panel troubleshooting points to the battery, two problems show up most often: the battery refuses to charge, or it empties much faster than expected. Both reduce backup power and can hide deeper system issues.
1. Battery Not Charging
A battery that stays flat even on sunny days usually has a break somewhere in the charging path. Start with the simple checks. Confirm the battery breaker or isolator is on and that all DC fuses are intact. Loose or corroded terminals create resistance that stops current from reaching the battery—clean and tighten them if safe to do so.
Next look at solar production. If the panels are dirty, shaded, or producing low voltage, little surplus energy reaches the battery. Check the charge controller or hybrid inverter display: it should show charging current when the sun is out. Wrong battery-type settings (lead-acid profile on a lithium bank, for example) or a BMS lockout from low temperature or deep discharge can also block charging. Lithium batteries often need a specific wake-up procedure if they have shut down for protection.
If voltage is present at the battery terminals but the state of charge never rises, the issue is usually settings, a failed charge circuit, or a battery that has reached end of life. Professional diagnosis is needed once the basic power path is confirmed.
2. Fast Discharge / Short Backup Time
A battery that was once lasting through the night but now dies in a few hours is usually facing higher loads, reduced capacity, or incomplete charging. First measure actual household consumption after sunset. Inverters, refrigerators, routers, and standby devices draw continuous power and can empty a smaller bank quickly. Large loads such as air conditioning or electric heaters accelerate the drain even more.
Aging is the next common cause. All batteries lose usable capacity over years of cycling; a pack that once delivered 10 kWh may now deliver only 6–7 kWh. Incomplete daytime charging—caused by low solar production, high daytime usage, or restrictive reserve settings—also leaves the battery starting the night undercharged. Temperature extremes further reduce available capacity, especially in cold weather.
Review the inverter’s discharge settings and minimum state-of-charge reserve. Many systems intentionally hold back a portion of the battery for backup or longevity. If capacity has dropped sharply and the pack is several years old, replacement is often the practical solution.
Monitoring App & Data Problems
A blank or inaccurate monitoring app is one of the most common solar panel troubleshooting complaints. In most cases the system is still producing power the communication link is simply broken.
No Data Showing
When the app shows zero production or “offline,” first confirm the inverter itself is powered and displaying normal status lights. A dark inverter points to a power or grid issue, not just monitoring.
Next reboot the home router and wait 10–15 minutes. Wi-Fi password changes, new routers, or weak signal strength frequently disconnect the monitoring dongle or gateway. Re-enter the correct network credentials in the manufacturer’s app if needed. Cellular gateways can also drop service; check signal strength or temporary carrier outages.
Firmware updates or temporary server-side issues on the manufacturer’s platform occasionally interrupt data flow. Closing and reopening the app, or logging out and back in, resolves many of these glitches. Persistent offline status after these steps usually requires the installer to re-pair the communication module.
Inaccurate Readings
When the app shows numbers that do not match reality—production that seems too low, missing hours, or spikes that never happened—the problem is almost always communication lag or sensor mismatch rather than actual system failure.
Compare the app data against the inverter’s local display and recent utility bills on similar sunny days. Temporary internet interruptions, delayed data uploads, or a recent app update can create gaps or lag. Time-zone mismatches or outdated firmware sometimes shift timestamps and make daily totals look wrong.
If individual panel or string data appears inconsistent while overall production looks reasonable, a single optimizer or microinverter may have lost communication. In that case the rest of the system continues working, but the app cannot report complete numbers. Persistent large discrepancies that do not match the inverter display or utility meter warrant a professional check of sensors and communication hardware.
How Much Is This Problem Actually Costing You?
Solar panel troubleshooting is not just about fixing hardware. Every unresolved issue quietly raises your utility bill. The table below converts typical efficiency losses into estimated monthly dollar impact for an average U.S. residential system (roughly 8 kW producing about 850 kWh per month at the national average rate of $0.18 kWh).
| Issue | Typical Efficiency Loss | Estimated Monthly Cost |
| Dirt / soiling | 5–15% | $8 – $23 |
| Partial shading | 10–40% | $15 – $60 |
| Loose or corroded connections | 5–20% | $8 – $30 |
| Inverter derating or fault | 20–100% | $30 – $150+ |
| Aging / degraded panels | 5–15% (over years) | $8 – $23 |
| Battery not charging fully | Variable (lost storage) | $15 – $50+ |
These are average figures. High-rate states or larger systems push the numbers higher. Small problems ignored for months turn into hundreds of dollars in lost production every year. Catching them early is the highest-ROI part of solar panel troubleshooting.
Will DIY Troubleshooting Void My Warranty?
Most manufacturers allow basic visual checks and gentle cleaning. Soft water, a soft brush, and staying off steep or wet roofs will not cancel coverage. What can void a warranty is pressure washing, abrasive tools, harsh chemicals, opening electrical enclosures, or any unauthorized repair or modification of panels, inverters, optimizers, or wiring.
Workmanship warranties from the installer are separate from the manufacturer product warranty. If you or an uncertified person alters the system, both may refuse future claims. Always photograph the system before and after any work, keep records of what you did, and when in doubt contact the original installer or manufacturer first. A quick call often confirms what is safe without risking coverage.
DIY vs. Call a Professional
Knowing the boundary between safe homeowner tasks and professional-only work protects both your safety and your warranty.
| Safe DIY Tasks | Professional-Only Tasks |
| Visual inspection from the ground or stable ladder | Opening inverter, combiner, or junction boxes |
| Soft cleaning with water and soft brush | Any DC or AC wiring work |
| Checking and resetting AC breakers | Replacing panels, optimizers, or microinverters |
| Reviewing monitoring app data and error codes | Diagnosing and repairing isolation or ground faults |
| Photographing visible damage for warranty claims | Battery system repairs or BMS resets that require tools |
| Clearing light debris or trimming nearby branches | Working on the roof when wet, steep, or high-risk |
| Confirming isolators and breakers are in the ON position | Any work that requires climbing onto the array itself |
If the task involves electricity beyond a simple breaker reset, requires roof access beyond a safe visual check, or could affect sealed components, stop and call a qualified solar technician. Proper solar panel troubleshooting balances quick homeowner checks with knowing when to hand the job to a pro.
Safety Precautions Before You Start
Solar panel troubleshooting involves electricity, height, and weather exposure. A few simple rules keep the process safe and protect both you and the system.
Always turn off the AC breaker labeled “Solar” or “PV” and the DC isolator before touching any wiring or connectors. Wait several minutes for capacitors to discharge. Never open an inverter, combiner box, or junction box unless you are a qualified electrician. Wet roofs, steep pitches, and high winds make ladder work especially dangerous skip roof access if conditions are not ideal.
Wear non-conductive gloves and closed-toe shoes when working near electrical components. If you smell burning, see melted insulation, or notice arcing, stop immediately and call a professional. These basic steps prevent the majority of accidents that occur during solar panel troubleshooting.
Preventing Future Problems (Maintenance Checklist)
Most performance drops are preventable with light, consistent care. Use this simple schedule to keep the system healthy year-round.
Monthly
- Glance at the monitoring app for sudden production drops or error alerts.
- Visually scan panels from the ground for heavy dirt, bird droppings, or new shading.
Quarterly
- Clean panels with soft water and a soft brush on a cool morning if soiling is visible.
- Check accessible connectors and conduit for corrosion or looseness (power off first).
- Confirm inverter vents are clear of debris and the unit has proper airflow.
Annually
- Review full-year production against the previous year and the installer’s estimate.
- Inspect mounting hardware and grounding connections for rust or movement.
- Test battery capacity (if you have storage) and note any reduction in backup time.
- Schedule a professional inspection every 3–5 years or after major storms.
A free downloadable PDF version of this maintenance checklist is available at the end of this guide. Print it, hang it near your inverter, and check items off as you go—small habits prevent the majority of costly solar panel troubleshooting calls.
Troubleshooting by Climate & Season
Climate and season change how problems appear and how quickly they should be addressed.
Snow and cold climates
Snow can block production completely until it slides off. Light accumulations are usually clear with sun and panel tilt; heavy, wet snow may need careful removal from the ground with a soft roof rake. Avoid walking on panels or using metal tools.
Cold weather also reduces battery capacity temporarily and can trigger low-temperature charge lockouts on lithium systems. Production naturally drops in winter because of shorter days and lower sun angles compare same-month data rather than summer peaks.
Hot and arid climates
High temperatures cause inverters to derate (reduce output) on the hottest afternoons. Ensure the inverter has clear ventilation and is not mounted in direct sun if possible. Dust accumulation is aggressive; soiling losses of 10–20% are common without regular cleaning. Check for hot spots after long heat waves, as thermal stress can accelerate cell degradation.
Coastal and humid areas
Salt air accelerates corrosion on connectors, frames, and mounting hardware. Inspect MC4 connectors and junction boxes more frequently for white or green residue. Moisture can also lower insulation resistance and trigger ground-fault or isolation errors after storms. Stainless or marine-grade hardware lasts longer in these environments. After heavy rain or high humidity, watch the monitoring app for isolation-fault codes that may clear once conditions dry.
Matching your solar panel troubleshooting approach to the local climate prevents both false alarms and overlooked damage.
FAQs
How do I know if my solar panels are broken?
Compare current production on clear days against the same month last year or the installer’s estimated yield. A sudden drop that does not match weather, visible cracks, burn marks, or persistent inverter error codes are strong indicators. Use the monitoring app to check individual panel or string performance one consistently underperforming panel while neighbors produce normally often points to a fault. Solar panel troubleshooting usually starts with these simple data and visual checks before assuming the panels themselves have failed.
Can I troubleshoot solar panels myself?
Yes, for many common issues. You can safely check breakers, review monitoring data, clean panels with soft water, and inspect for obvious dirt or shading. Anything involving opening electrical enclosures, working on DC wiring, or climbing onto a steep or wet roof should be left to a qualified technician. Knowing the boundary keeps both you and the warranty protected during solar panel troubleshooting.
How much does it cost to fix a solar panel problem?
Costs vary widely. Simple cleaning or resetting a tripped breaker is free or under $200. Replacing a single panel typically runs 200–600 plus labor. Inverter replacement often falls between $1,800 and $3,500. Wiring or connector repairs usually cost a few hundred dollars. Warranty coverage can eliminate or greatly reduce out-of-pocket expense if the issue is a manufacturing or workmanship defect.
Does a lower electricity bill mean my solar panels are working?
A lower bill is a positive sign, but it is not complete proof. Seasonal changes, reduced household consumption, or time-of-use rate shifts can also lower the bill. The most reliable confirmation comes from the monitoring app or inverter production data. If the system is generating near expected levels on sunny days, the panels are performing as they should.
How long can a solar panel go without producing power before it’s a serious problem?
A day or two of zero production during heavy cloud cover or snow is normal. Zero production on multiple consecutive clear, sunny days is not. At that point the system needs immediate attention—check breakers, the inverter display, and monitoring data right away. Prolonged outages waste the investment and can signal issues that worsen if left unaddressed.
Final Takeaway
Most solar panel troubleshooting problems are straightforward once you match the symptom to the right check. Dirt, new shading, tripped breakers, inverter codes, and monitoring glitches account for the majority of cases. Start with the diagnostic flowchart, work through the safe homeowner steps, and call a professional when the issue moves beyond visual inspection or simple resets.
Regular light maintenance and quick attention to production drops protect both your energy savings and the long-term health of the system. Use the checklist, watch the numbers, and act early. A few minutes of focused troubleshooting today prevents months of unnecessary utility bills tomorrow.